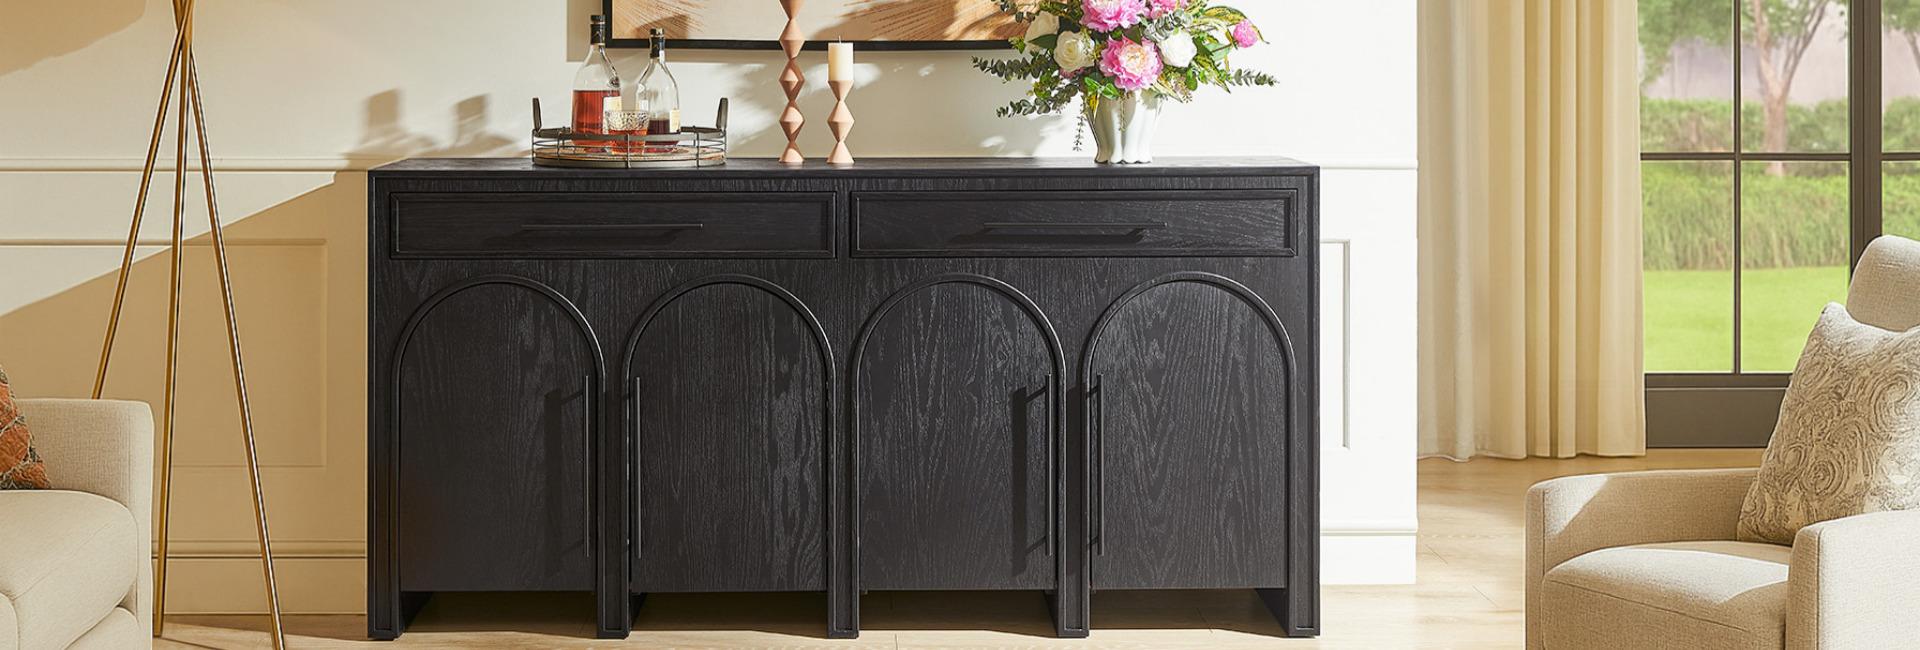
You can turn a sideboard buffet cabinet into a home coffee bar in one afternoon: put it within reach of an outlet, give the machine a spot with breathing room on top, stash beans, filters, and mugs in the storage below, and protect the surface with a tray. No contractor, no plumbing, no built-in cabinetry required. We've set up several of these in our studio, and honestly, the sideboard beats every rolling cart we've tried. It doesn't wobble when you tamp a portafilter. It hides the clutter behind real doors. And when friends come over for brunch, it already looks like furniture, not equipment.
This guide walks through the whole build: the measurements that decide whether your machine actually fits, the way to zone the top so your morning routine flows, the cord problem nobody warns you about, and the styling moves that make a sideboard buffet cabinet read as a café corner instead of a kitchen overflow zone. If you'd rather see the furniture side first, our sideboards and buffets collection is a good starting point.
Table of Contents
- Why a Buffet Sideboard Cabinet Beats a Built-In Bar
- Get the Numbers Right Before You Buy
- Choosing a Sideboard Buffet Cabinet That Fits Your Space
- Set Up the Top of Your Sideboard Buffet Cabinet
- Manage Cords on a Sideboard Buffet Cabinet Coffee Bar
- Organize Storage Inside a Sideboard Buffet Cabinet
- Protect Your Sideboard Buffet Cabinet from Coffee Stains and Heat
- Style a Sideboard Buffet Cabinet as a Home Coffee Bar
- Use a Sideboard Buffet Cabinet for Coffee and Entertaining
- Your Setup Checklist, Start to Finish
- FAQs
- What height should a coffee bar cabinet be?
- Can I put a coffee bar in the dining room instead of the kitchen?
- How deep does a sideboard need to be for an espresso machine?
- How much counter space do I need for a home coffee bar?
- How do I protect a wooden sideboard top from coffee stains and heat?
- Can a coffee bar sideboard double as a home bar for entertaining?
Why a Buffet Sideboard Cabinet Beats a Built-In Bar
A built-in coffee bar is lovely if you're already remodeling. For everyone else, it's a five-figure project that starts with a contractor and ends with permits. A sideboard sidesteps all of it. You get a long, stable work surface at roughly counter height, a mix of drawers and cabinets underneath, and the freedom to put the whole thing wherever an outlet lives.
That portability is the real selling point. Rent it, own it, move in three years, rearrange the dining room on a whim: the coffee bar comes with you. Built-ins don't travel. Carts travel but shake every time you reach for a mug, and their skinny shelves max out around two machines and a jar of beans.
There's a storage math argument too. A typical kitchen cart gives you maybe 2 cubic feet of enclosed storage. A 64-inch sideboard gives you four or five times that behind closed doors, which is the difference between "coffee station" and "everything I own with a handle on it, displayed to the room." Closed storage matters even more in open-concept homes, where the dining area is visible from the front door.
And when you want the surface back for a holiday buffet or a spread of appetizers, the coffee gear tucks away in ten minutes. Try that with plumbed-in equipment.
Get the Numbers Right Before You Buy
Most failed coffee corners aren't styling mistakes. They're dimension and electrical problems discovered the day the machine arrives. Measure these three things first and you'll avoid 90% of the regret.
The Height Rule: 34 to 36 Inches
The National Kitchen & Bath Association sets standard kitchen counters at 36 inches, and that number exists for a reason: it's the height where most adults can tamp espresso, fill a carafe, and work a machine without hunching. A sideboard between 34 and 36 inches tall feels like working at your kitchen counter. Anything below about 32 inches and you're bending over every morning; espresso machines with top-loading water tanks get genuinely annoying at that height.
Sideboards tend to run a bit lower than counters, often 30 to 34 inches, which is still fine for pod machines and drip makers. If you're a daily espresso person, favor the taller end. Check the spec sheet, not the photo.
Depth: Where Machines Meet Mistakes
Depth is where sideboard coffee bars quietly fail. A full-size espresso machine runs 17 to 19 inches deep once you account for the portafilter sticking out front and a couple of inches of airflow behind the back panel. Add the drip tray overhang and you want a sideboard that's at least 18 inches deep. Plenty of handsome pieces are 15 or 16 inches deep, which technically holds the machine while leaving you wiping spills off the front edge.
Measure your machine's full depth including knobs and the steam wand, not just the box footprint. If your piece is on the shallow side, pull the machine forward until the drip tray clears the edge and push the cord gap against the wall instead. It works, but you lose some usable top surface.
The Outlet and Circuit Question
Here's the part almost everyone skips: power draw. A standard 15-amp, 120-volt household circuit tops out around 1,800 watts. A prosumer espresso machine pulls 1,200 to 1,500 watts on its own, and an electric kettle adds another 1,500. Run both on the same power strip and you'll trip the breaker mid-breakfast, probably while the machine is mid-shot.
Two fixes, no rewiring needed: put the kettle on a different wall outlet (ideally a different circuit), or skip the strip and plug the machine straight into the wall. The sideboard doesn't care; it just needs to sit close enough to an outlet that cords reach without extensions. Pick the wall before you pick the furniture.
Choosing a Sideboard Buffet Cabinet That Fits Your Space
Once the numbers are settled, choose the piece for the wall it will live on and the room it will be seen in. A coffee bar cabinet works hardest when it looks like it belongs: same finish family as your dining set, similar hardware tones, proportions that suit the wall width.
A long wall (say, 8 feet or more) can carry a wide piece with room left for a lamp or a stack of serving boards at one end. Smaller dining rooms and apartment nooks do better with something in the 60-to-64-inch range that leaves clearance for door swings and chair push-backs.
Two examples from our own line to show the range. On a generous dining room wall, the Vera 72-Inch Sideboard in black oak is hard to beat for a coffee bar that means business. The repeated arched fronts break up a full 72 inches of cabinet so it reads sculptural rather than blocky, the drawers are joined with dovetail joints (they'll survive years of daily pod-and-filter rummaging), and the wire-brushed oak veneer gives the surface enough texture that water rings and fingerprints don't shout at you. At 72 inches wide you can run machine, grinder, kettle zone, and a cup landing strip all on one top.
Tight on wall? The Sabina 64-Inch Ash Wood Sideboard is our pick for smaller rooms. Its square fluting runs the full height of the doors and doubles as the handles, so there's no hardware to catch a dish towel on, and the adjustable shelves inside let you set shelf heights around a coffee canister collection instead of the other way around. Solid ash construction keeps it sturdy under a heavy machine, and the warm brown finish sits comfortably next to walnut, oak, or painted pieces.
Whichever piece you choose, prioritize three features in this order: adjustable interior shelves, a finish that wipes clean, and doors that open fully without hitting an adjacent wall. Everything else is negotiable.
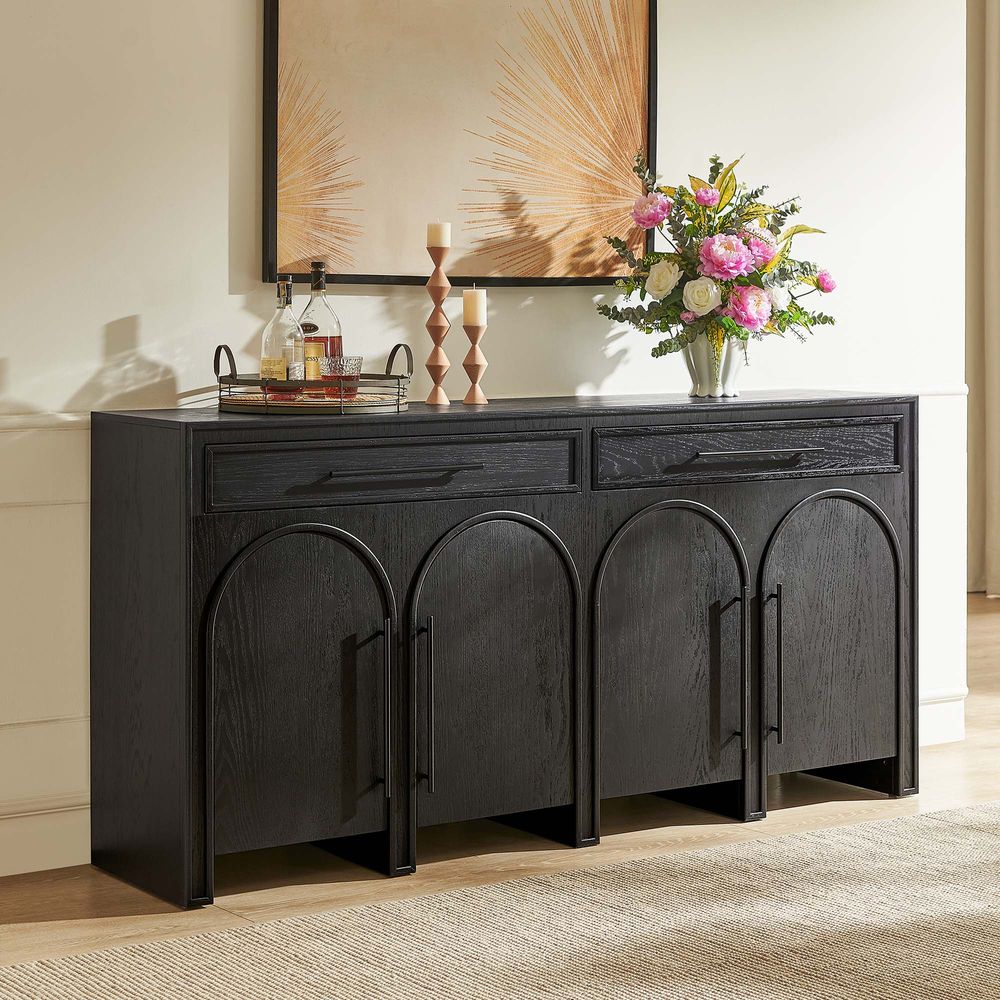
Vera 72-Inch Sideboard
View Product
Set Up the Top of Your Sideboard Buffet Cabinet
The difference between a coffee bar you use daily and one that becomes a decor shelf is flow. Arrange the top left to right in the order your hands actually move: beans and grinder, then the machine, then the cup landing zone, then supplies. On a 60-inch top, that breakdown looks like this:
Keep the prep zone genuinely empty. It's tempting to style every inch, but the first time you fill a mug with boiling water over a decorative bowl of lemons, you'll understand why baristas guard their landing space. If your top is deep enough, put the daily-use items in the front half and let taller, less-used stuff (a French press, a pour-over kettle you use on weekends) live toward the back.
One more pro habit: keep a tray under the syrups, sugar bowl, and spoons. Drips happen, and a tray turns a spill from a cabinet-top cleanup into a fifteen-second sink rinse.
Manage Cords on a Sideboard Buffet Cabinet Coffee Bar
Cords are the single biggest reason a coffee bar looks messy two weeks after setup. An espresso machine, grinder, and kettle generate three cables, and if they droop over the front edge, the whole station starts reading as a desk under a desk. A sideboard is worse than a cart here, because a cart at least has open legs to thread a cable through. A closed cabinet gives cords exactly nowhere to go.
The cleanest fix happens before the piece arrives. When you're shopping, look for a back panel with factory openings, usually listed as cord management, cable cutouts, or component cutouts. Two or three of them near the base let you drop every cable into the dead space behind the cabinet instead of looping it around a leg. If your sideboard is already in the house, a 2-inch hole saw plus a plastic grommet insert does the same job in about ten minutes. Drill from the back so any tear-out stays hidden, and seal the raw edge with a thin swipe of wood glue before you push the grommet in. That seal matters more than it sounds; a bare particleboard edge wicks moisture and swells the first time a spill finds it.
For a piece you'd rather not cut into, you have options:
-
Adhesive cord clips along the back edge and down a leg, routing cables toward the outlet instead of across the floor
-
A cord cover box behind the sideboard, painted to match the wall so it disappears in the shadow line
-
A woven basket tucked behind the piece, collecting slack and the spare plug you're not using
Bundle the three cables with hook-and-loop ties rather than zip ties. Zip ties crush the cable jacket and you'll be cutting them off the moment you swap machines anyway. While you're back there, put a small label on each plug; the day something stops working, you'll be glad you can tell the grinder from the kettle without unplugging all three.
Whatever route you take, leave a service loop of slack so pulling the sideboard forward to clean doesn't yank a plugged-in machine off the top. And skip the extension-cord-plus-power-strip tower shoved under the cabinet. That's the setup that trips breakers and, worse, traps heat in an enclosed space. Surge protectors are rated for open air, not for a cabinet with the doors shut.
Organize Storage Inside a Sideboard Buffet Cabinet
The cabinets and drawers under a coffee bar decide whether the top stays calm or collects clutter. The rule we use: anything you touch daily lives in the top drawer or on the surface; anything weekly goes in the upper cabinets; anything monthly or seasonal goes deep.
Drawers are made for the small stuff. Divided, they hold pods, filters, tea bags, spoons, sugar packets, and those napkins you bought for hosting. If your piece has one deep drawer, spend ten dollars on drawer dividers; the alternative is an archaeological dig every morning.
Cabinets take the bulky gear: the bean stockpile in airtight containers, the guest mugs you only pull out for company, the French press, the milk frother's box, and the syrup overflow. Adjustable shelves earn their keep here, because a shelf set at 11 inches fits mugs stacked two high while a 14-inch gap swallows a bulky kettle base.
Two storage tricks worth stealing from actual cafés. First, mount a small swing-top trash bin inside a cabinet door for used grounds and filters: hidden, but one step from the machine. Second, keep a fold-flat tray in a cabinet for carrying the whole sugar-and-syrup kit to the table when you host. Your future self, carrying one tray instead of six loose items, will be grateful.
Protect Your Sideboard Buffet Cabinet from Coffee Stains and Heat
A coffee station is a wet, hot, slightly sticky environment, and the sideboard top takes the abuse. Daily service means near-boiling cups, steam from the machine, and the occasional milk spill. Wood finishes vary in how much of that they shrug off.
The universal fix is a tray or mat under the machine zone. A large marble or wood tray catches most drips, defines the workspace visually, and wipes clean in seconds. Under mugs, use coasters; condensation rings from a cold-brew glass set as permanently as a hot pan mark.
Ventilation is the underrated piece. Espresso machines vent steam and heat backward, so pull the machine an inch or two off the wall and, if your sideboard sits flush against it, leave a small gap between the cabinet back and the wall too. That airflow gap keeps moisture from pooling behind the piece where you'd never notice it until the finish clouds.
One care habit matters more than everything else combined: wipe drips the same day. Coffee is acidic and milk is worse; both etch finishes if left overnight. A damp cloth within a few hours keeps even delicate veneers looking new for years.
Style a Sideboard Buffet Cabinet as a Home Coffee Bar
Once it works, make it look like the reason you gave up the café habit. A mid century modern sideboard with tapered legs and clean lines sets the tone on its own; the styling around it just finishes the sentence.
Start above the piece. A framed print, a vintage café poster, or a mirror marks the wall as a destination and gives the station a focal point, the way espresso machines chained to a chalkboard menu do in real cafés. Hang it at standing eye level, roughly 60 to 66 inches off the floor, so it clears the machine.
On the surface, build a little height variation. Stack two coffee-table books and set a small potted plant or a candle on top. Put daily mugs on a stand rather than in a flat row. Keep roughly two-thirds of the top working and one-third styled; flip that ratio and you've built a display case, not a coffee bar.
Lighting is the move most people skip. A small table lamp at one end of the sideboard, on a warm bulb, makes a 6 a.m. coffee run feel like something you'd look forward to instead of a chore in the dark. If the piece sits in a dim corner, that one lamp does more for the vibe than any amount of art.
Match your appliance finishes to the hardware you already have. Matte black machines flatter black frames and dark oak; brushed stainless pairs with brass and warm wood. It's a small thing, but it's the difference between a coffee bar that looks collected and one that looks assembled.
Use a Sideboard Buffet Cabinet for Coffee and Entertaining
The best argument for a buffet sideboard cabinet over a dedicated coffee cabinet is the second act. When you're not brewing, the same piece serves the dining room.
For dinner parties, clear the machine zone and set out after-dinner coffee service: a carafe or French press, dessert plates, small spoons, and the sugar bowl from the daily setup. Guests serve themselves and you stay at the table, which is the entire point of hosting. The drawers that hold filters on Tuesday hold dessert spoons on Saturday without any reorganization.
The storage below flexes just as easily. Between uses, the same cabinets that stock beans swallow table linens, serving dishes, and the good candles. When the season changes, the coffee bar becomes a hot-cocoa station in December or a bloody-mary bar at a backyard brunch. One piece of furniture, four or five jobs a year, and every one of them looks intentional because the piece was chosen to belong in the room.
That's the quiet financial case too. A dedicated coffee cabinet does one thing. A good sideboard, bought once, works as a coffee bar, a buffet, a bar, and a storage upgrade, and it moves houses with you. We've never regretted spending on the better piece for exactly this reason.
Your Setup Checklist, Start to Finish
Here's the whole project compressed into twenty minutes of decisions and an afternoon of arranging:
-
Measure the wall and confirm at least 36 inches of width for machine plus prep zone, more if you're adding a kettle.
-
Confirm the outlet. Within cord reach of the machine's spot, on a circuit that isn't already loaded with a microwave or kettle.
-
Check the machine's full depth and height, including lids and steam wands, against the sideboard's depth and any shelf above.
-
Choose the piece: 34–36 inches tall for espresso daily-drivers, adjustable shelves, cleanable finish, cord cutouts if you can get them.
-
Zone the top in working order: grinder, machine, landing zone, supplies, with a tray under anything that drips.
-
Load the storage by frequency: daily in drawers, weekly in upper cabinets, seasonal deep.
-
Route and slack the cords with clips or a covered channel; no power-strip towers in enclosed cabinets.
-
Add one lamp and one piece of art, then stop. The station should look used, not staged.
Follow those in order and the piece you pick will work from the first morning, not eventually. The most common mistake we see is buying the furniture first and checking the machine second; the checklist above reverses that, and it's the single highest-leverage change you can make.
FAQs
What height should a coffee bar cabinet be?
Aim for 34 to 36 inches, matching standard kitchen counter height, especially if you use an espresso machine daily. Sideboards in the 30-to-34-inch range work fine for pod machines and drip makers, but below 32 inches you'll hunch over a top-loading water tank every morning.
Can I put a coffee bar in the dining room instead of the kitchen?
Yes, and it's often the better spot. A freestanding sideboard needs only an outlet, so a dining room wall lets you reclaim kitchen counters while keeping the station close enough to refill water and dump grounds without a hike. It also puts the machine right where after-dinner guests gather.
How deep does a sideboard need to be for an espresso machine?
Plan on at least 18 inches. A full-size espresso machine runs 17 to 19 inches deep once you count the portafilter, the drip tray overhang, and the airflow gap behind the back panel. Pieces at 15 or 16 inches deep work only if you pull the machine forward and accept a smaller top.
How much counter space do I need for a home coffee bar?
At least 36 inches of width for one machine and a grinder with a cup landing zone; 60 inches or more if you want a kettle, milk station, and supplies on the same top. Keep a 14-to-18-inch clear patch for filling cups, and don't style it.
How do I protect a wooden sideboard top from coffee stains and heat?
Keep a large tray under the machine and syrups, use coasters under every cup, and wipe drips the same day (coffee and milk both etch finishes overnight). Pull the machine a couple of inches off the wall for airflow, and choose textured or matte finishes over glossy ones if wear visibility worries you.
Can a coffee bar sideboard double as a home bar for entertaining?
That's the best reason to choose a sideboard over a dedicated coffee cabinet. Keep coffee items on one side and bar tools on the other, stock the cabinets with glassware and bottles, and swap the top between morning and evening service. The same piece also works as a holiday buffet with everything tucked away in minutes.