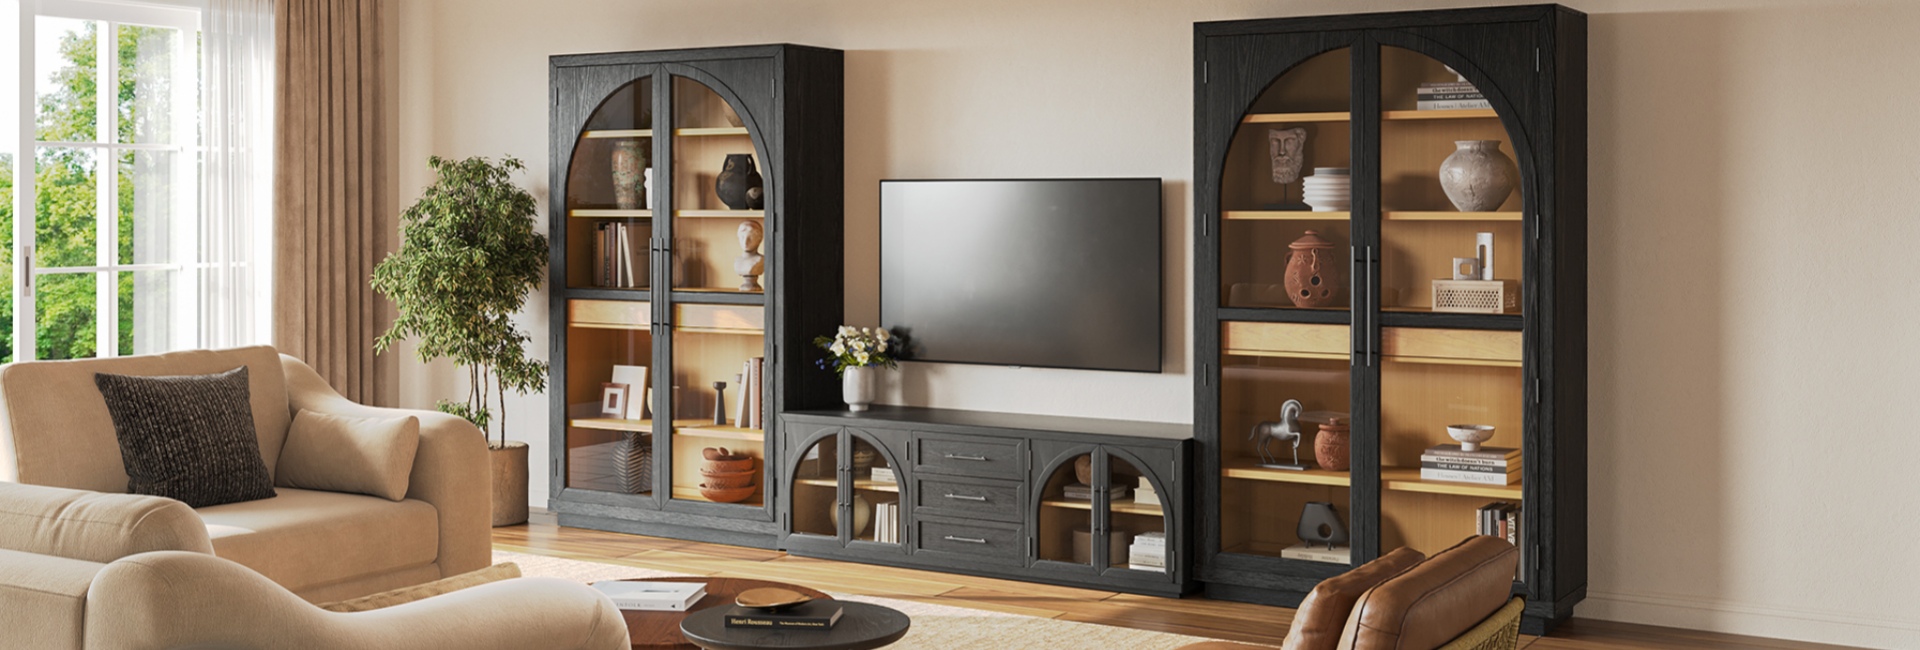
A wall-mounted TV above a media console can make a living room feel more organized while preserving the storage space a traditional TV stand provides. The screen stays on the wall, while the console below holds streaming devices, game systems, remotes, and other everyday essentials.
The arrangement sounds simple, but getting it right takes more planning than choosing a spot above the cabinet and drilling a few holes. You need a wall mount that matches your television, a suitable mounting surface, a comfortable viewing height, and enough clearance for the console and connected equipment.
One distinction is especially important: the TV is mounted to the wall, not to the media console. The wall and an appropriately installed mounting system support the television. The console is a separate piece of furniture and should be selected for its own dimensions, storage capacity, and recommended weight limit.
This guide walks through the process, from measuring the TV and console to checking the wall, installing the bracket, and organizing cables. It also explains what to look for in a media console so the finished setup works as well as it looks.
Table of Contents
- Quick Answer: How Do You Wall Mount a TV Above a TV Stand?
- Understand How a Wall-Mounted TV and TV Stand Work Together
- Choose a TV Wall Mount That Matches Your Television
- Measure the TV, Console, and Viewing Area Before Drilling
- Find a Comfortable TV Mounting Height
- Identify the Wall Construction and Check for Hidden Obstructions
- Gather the Tools and Prepare the Work Area
- How to Wall Mount a TV Above a TV Stand: Step by Step
- Choose a Media Console That Complements the Wall-Mounted TV
- For a wide media wall: Vittorio 84-Inch Elm Media Console
- For a shallower footprint: Bodil 78-Inch Burl Media Console
- For a textured finish and adjustable storage: Renata 84-Inch Travertine-Textured Media Console
- For an arched black-oak look: Valborg 80-Inch Oak Media Console
- Compare the dimensions and practical details
- Which console details matter most?
- Plan Cable Management, Soundbar Placement, and Ventilation
- Common TV Wall-Mounting Mistakes to Avoid
- Complete a Final Safety and Placement Check
- FAQs
- How high should a TV be mounted above a TV stand?
- Do you need wall studs to mount a TV?
- Can you mount a TV on drywall without studs?
- How do you know which TV wall mount fits your TV?
- Should a TV stand be wider than a wall-mounted TV?
- How much space should be between a TV and a TV stand?
- How do you hide TV wires after wall mounting?
- Is it better to wall-mount a TV or put it on a TV stand?
Quick Answer: How Do You Wall Mount a TV Above a TV Stand?
To wall mount a TV above a TV stand, first choose a bracket compatible with your TV's weight and VESA mounting pattern. Measure the television, console, and viewing position together, then identify the wall construction and the appropriate structural fixing points. Check for hidden wiring and plumbing before drilling. Install the wall plate with the fasteners specified for that wall, attach the TV brackets, and secure the screen according to the manufacturer's instructions.
Position the console below the TV with enough room for a soundbar, cables, and media equipment. The console does not carry the wall-mounted television, so its tabletop weight capacity should never be treated as the TV mount's load rating.
Understand How a Wall-Mounted TV and TV Stand Work Together
A wall-mounted TV and console arrangement has three separate components:
-
The television: The screen you watch.
-
The wall-mounting system: The bracket and approved fasteners that connect the TV to the wall structure.
-
The media console: The furniture below the screen, used for storage and compatible electronic equipment.
The mounting plate attaches to suitable wall structure. The TV's mounting arms connect to the threaded holes on the back of the television. The console sits underneath, providing storage and, when appropriate, a surface for a soundbar or other devices.
This setup differs from two other common arrangements:
-
Tabletop TV setup: The television rests on its factory feet or pedestal on a suitable furniture surface.
-
Freestanding TV stand with a mounting bracket: A purpose-built stand supports a vertical mounting pole or bracket designed to hold the screen.
-
Wall-mounted TV above a console: The wall supports the television through a compatible wall mount. The console below is independent of the TV's mounting system.
This guide focuses on the third arrangement. It can free up the console top, make room for a soundbar, and give the entertainment area a more open appearance. It also means you can choose a console based on storage, dimensions, and design rather than needing a built-in TV-mounting column.
Choose a TV Wall Mount That Matches Your Television
A wall mount should never be selected by screen size alone. A label that says a bracket fits TVs up to 65 inches does not automatically mean it works with every 65-inch model.
Check the television's owner manual or manufacturer specification sheet before buying a mount. Compare the following details with the bracket's compatibility information.
Check the TV's weight and VESA pattern
The TV's weight without its tabletop feet must fall within the wall mount's rated capacity. You should also confirm its VESA mounting pattern.
VESA describes the spacing between the four threaded mounting holes on the back of a display. Measurements are given in millimeters, with the horizontal distance listed first and the vertical distance second. Common patterns include 200 × 200, 400 × 200, and 400 × 400, but the correct pattern depends on the TV model.
Do not assume two televisions with the same diagonal screen size have identical mounting-hole spacing.
The bracket must support the TV's VESA pattern and use the correct fasteners. The VESA mounting standard provides information about display mounting interfaces, but your television's manual remains the reference for its exact mounting requirements.
Screw diameter and length vary by TV. A screw that is too short may not engage properly; one that is too long can damage internal components. Use only the hardware and spacers specified by the TV and mount manufacturers. If the required screw size is unclear, contact the manufacturer instead of guessing.
Choose a mount style that suits the room
Think about where people usually sit before choosing. If the sofa faces the TV directly, a fixed mount may be all you need. If the room has regular side seating, a full-motion bracket may offer more flexibility.
Also consider the space around the console. An articulating arm needs room to extend and swivel without hitting nearby furniture, wall décor, or the cabinet. A fixed mount creates a streamlined appearance, but it can make rear ports harder to reach.
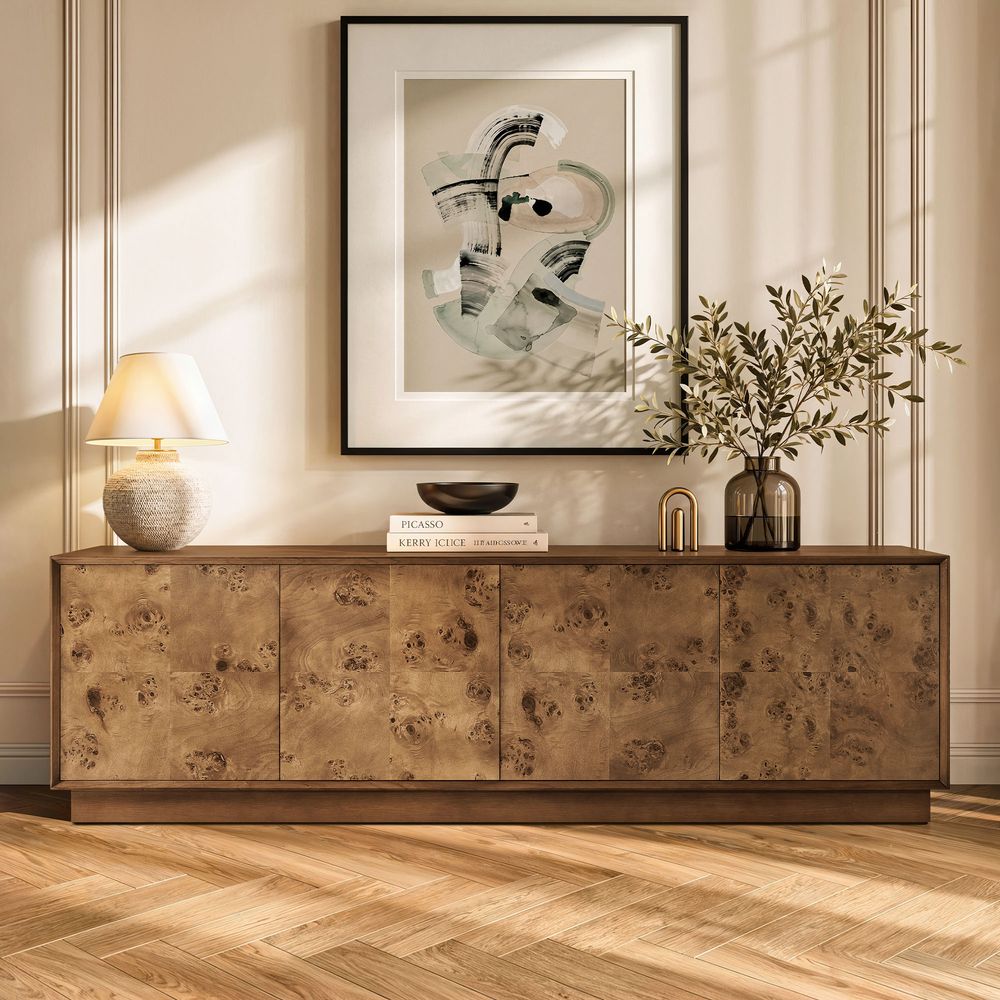
Bodil 78-Inch Burl Media Console
View Product
Measure the TV, Console, and Viewing Area Before Drilling
One common planning mistake is deciding where the TV should go and only then trying to fit the console underneath it. Measure both pieces together. The goal is a comfortable viewing position, a balanced layout, and enough clearance for equipment and cables.
Measure the actual TV and console widths
A TV's advertised size refers to its diagonal screen measurement, not its width. Measure the actual television, including its outer frame, before planning the wall layout.
Then measure the console. A cabinet that is noticeably narrower than the screen can make the arrangement feel top-heavy. A wider console often creates a more grounded composition, although the right proportion depends on the room, screen size, and surrounding furniture.
For example, an 84-inch console can provide a substantial base beneath a large television. The Vittorio 84-Inch Elm Media Console measures 84 inches wide and is designed for TVs up to 85 inches. Its four rear cord cutouts can help organize connected equipment, while its solid rubberwood and plywood with elm veneers and raised grid detailing give the cabinet a distinctive appearance.
The TV still needs its own wall-mounted support. The console's product-page TV-size guidance is not a wall-mount rating.
Account for console height and screen position
Measure the console from the floor to its top surface. Then determine where the bottom edge of the TV should sit, allowing enough room for a soundbar or other equipment if needed.
There is no universal gap that works for every room. A tall soundbar, center speaker, console, or tilting bracket can change the clearance you need. Measure the equipment itself rather than relying on a generic spacing recommendation.
Console depth matters, too. Check whether cabinet doors can open fully, whether components can be reached, and whether cables can bend without being pinched. A receiver may need considerably more space than a small streaming device. Compare the equipment's dimensions with the console's usable interior space, not just its outside measurements.
Use painter's tape to test the layout
Before drilling, mark the TV's approximate outside dimensions on the wall with painter's tape. Position the console where it will actually sit, or mark its footprint on the floor.
Then sit in the usual viewing position. Check the screen from the sofa and any regular secondary seating. Look at the taped outline while sitting naturally rather than standing directly in front of the wall.
This simple test can reveal problems that are easy to miss when planning with measurements alone, such as a screen that feels too high or a console that looks too small beneath it.
A practical example: 75-inch TV above an 84-inch console
A standard 16:9 screen measuring 75 inches diagonally has an approximate visible screen width of 65.4 inches and a height of 36.8 inches. Actual TV dimensions vary by model because of the frame and housing.
Imagine pairing that screen with an 84-inch-wide console that stands 25 inches high. Suppose you want to place a 3-inch-tall soundbar on the console and leave 2 inches of clearance above it.
The bottom of the TV would sit approximately 30 inches from the floor:
-
Console height: 25 inches
-
Soundbar height: 3 inches
-
Clearance above soundbar: 2 inches
-
Approximate TV bottom height: 30 inches
With a screen height of 36.8 inches, its center would be approximately 48.4 inches from the floor.
This is an illustrative layout calculation, not a universal recommended mounting height. Whether it feels comfortable depends on seated eye level, sofa height, viewing distance, and personal preference. Use your own measurements before deciding where to drill.
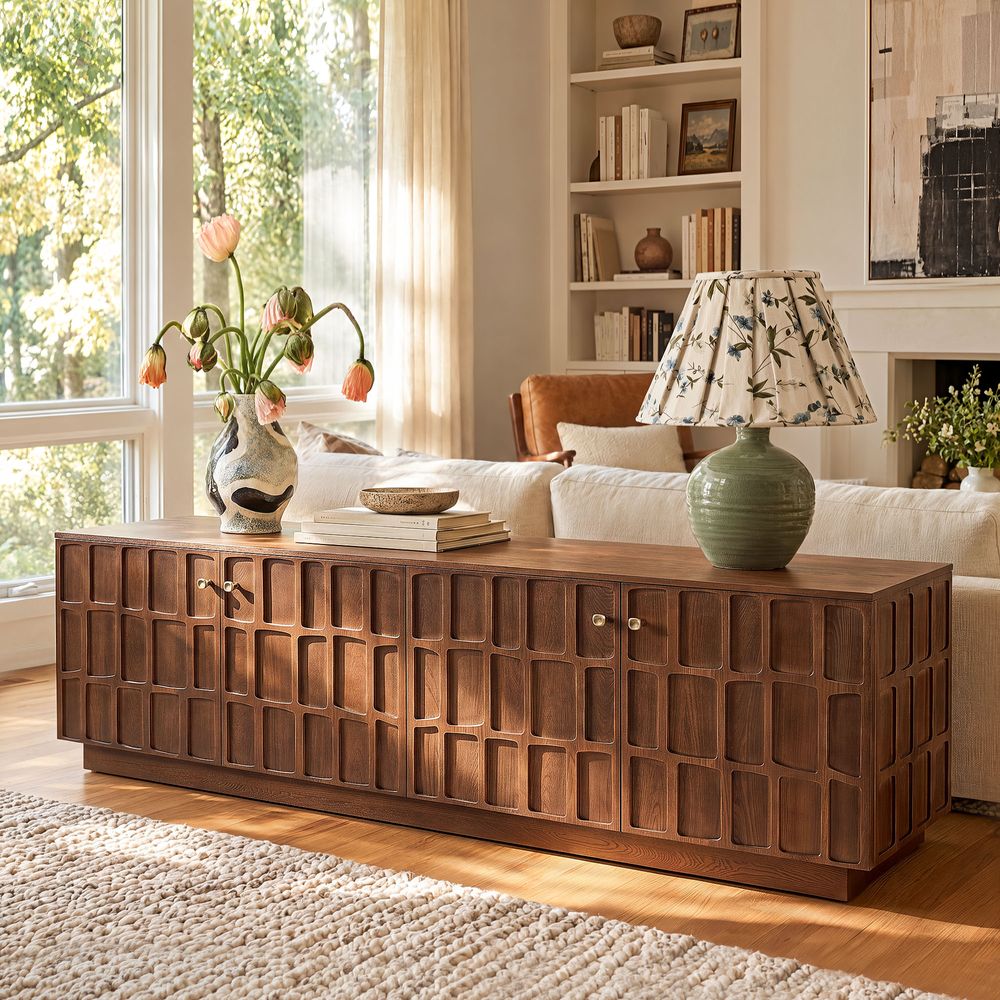
Vittorio 84-Inch Elm Media Console
View Product
Find a Comfortable TV Mounting Height
A useful starting point is to place the center of the screen near the seated eye level of the people who regularly use the room.
An average seated eye level is roughly 42 inches from the floor, making it a useful starting point for determining TV mounting height. However, this is not a fixed rule. Sofa height, viewer height, screen size, viewing distance, and reclining habits all influence the most comfortable viewing position.
To plan your own setup:
-
Sit in the main viewing seat in your normal posture.
-
Measure from the floor to your eyes.
-
Measure the actual height of the TV.
-
Calculate the screen's center point.
-
Compare the planned screen center with seated eye level.
-
Adjust for console height, soundbar clearance, and the room's viewing angles.
For example, if the console is tall, you may be tempted to raise the TV to create a larger gap. That can push the screen too far above eye level and make longer viewing sessions uncomfortable.
If the layout requires a somewhat higher screen position, a compatible tilting mount may help adjust the viewing angle. However, it is worth considering whether a lower console or a different wall location would produce a more comfortable result.
Identify the Wall Construction and Check for Hidden Obstructions
The wall is responsible for carrying the television's load. Before choosing fasteners or drilling, identify the wall construction. A mounting method suitable for wood studs is not automatically appropriate for metal studs or masonry.
Wood-stud drywall
In a typical U.S. wood-framed wall, drywall is attached to vertical wood studs. A TV mount should be secured to suitable structural framing using the fasteners and installation pattern specified by the mount manufacturer.
Use a stud finder to locate the studs, mark their edges, and confirm their centers. Stud spacing is often 16 inches on center and sometimes 24 inches, but do not rely on typical spacing without locating the actual framing.
The mount's instructions determine how many studs and fixing points are required. Some brackets have different hole patterns, so confirm that the mounting plate can be installed as directed before drilling.
Metal-stud walls
Metal-stud walls require a mounting system and fasteners specifically approved for that construction. Do not substitute ordinary wood-stud lag screws or assume that a bracket designed for wood framing is suitable.
Depending on the wall and mount, the installation may require an approved metal-stud mounting solution or reinforcement. Follow the bracket manufacturer's instructions for the exact stud type and load conditions. If the required method is unclear, have a qualified installer assess the wall.
Brick, concrete, and other masonry
Masonry requires anchors and drill bits rated for the specific material and installation load. The mounting system must be fastened into the appropriate masonry material, not simply into a mortar joint unless its instructions specifically permit that method.
Brick, concrete, hollow block, and stone do not all behave the same way. Older, cracked, uneven, or unfamiliar masonry may need professional assessment before installation.
Check for electrical wiring, plumbing, and other hidden services
Finding a stud does not mean the area is automatically safe to drill. Electrical cables, plumbing, and other hidden services may run through or near the wall cavity.
Before drilling:
-
Check the proposed drilling area with an appropriate detection tool.
-
Review available building plans or renovation information when possible.
-
Look for nearby outlets, switches, plumbing fixtures, and other clues that may indicate hidden services.
-
Do not drill where you cannot reasonably rule out an obstruction.
-
If you are uncertain about what is behind the wall, have a qualified professional inspect it first.
Never force a drill through unexpected resistance. Stop and reassess rather than assuming the obstruction is harmless.
Can you mount a TV on drywall without studs?
Do not assume ordinary drywall anchors are suitable for a television wall mount. Some specialized mounting systems are designed for specific wall constructions, but their permitted loads and installation conditions are limited to the systems and materials for which they are approved.
Check the mount manufacturer's instructions and the wall material. If the instructions call for wood studs, masonry, or reinforcement, follow those requirements. Generic hollow-wall anchors are not a universal substitute for structural support.
Gather the Tools and Prepare the Work Area
Having the right tools ready makes the installation more controlled. Depending on the wall and bracket, you may need:
-
A compatible TV wall-mount kit and its complete hardware
-
A stud finder suitable for the wall construction
-
A tape measure and pencil
-
A level or the leveling method specified by the mount
-
A drill and the correct drill bits
-
A socket wrench or screwdriver that fits the supplied fasteners
-
Painter's tape for marking the screen outline
-
A clean, padded surface if the TV needs to be laid down
-
A second adult to help lift and position the television
-
Safety glasses and any other protective equipment required for the work
Read the TV and mount manuals before starting. Check that all parts are present and that the bracket is not bent or damaged.
Keep the TV-to-bracket screws separate from the wall fasteners. They perform different jobs and are not interchangeable. Do not use leftover screws simply because they appear to fit.
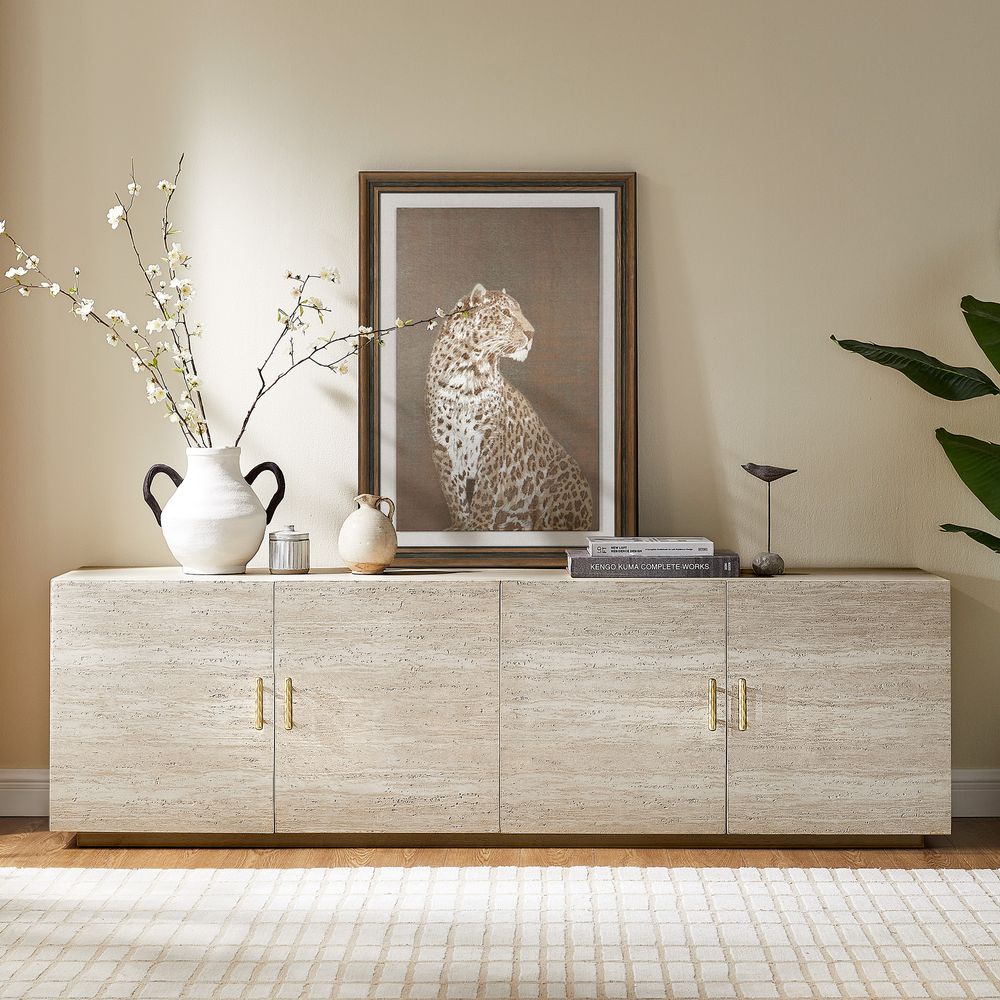
Renata 84-Inch Travertine-Textured Media Console
View Product
How to Wall Mount a TV Above a TV Stand: Step by Step
Once you have confirmed the layout, wall construction, and mounting hardware, follow the exact sequence in the bracket instructions. The manufacturer's manual takes priority because mounting systems and wall types differ.
Step 1: Mark the TV position
Use painter's tape to mark the planned screen outline. Confirm that the TV is centered where intended and that the space above the console is sufficient for the soundbar, cables, and any equipment.
Sit in the usual viewing position again. Make any height or alignment adjustments before drilling.
Step 2: Locate and mark the structural fixing points
Find the required wood-stud centers or approved masonry fixing points. Confirm that the wall plate's holes align with suitable structural support.
If the mounting plate does not align with the required fixing points, do not improvise by skipping holes or substituting unsuitable anchors. Reconsider the bracket position or use an installation method approved for that wall.
Step 3: Position the wall plate
Use the bracket's template and a level to mark the mounting holes. Remember that the wall plate may not sit at the visual center of the TV because the VESA holes can be offset from the screen's center.
Check the full outline and mounting position once more before drilling.
Step 4: Drill and secure the wall plate
Before drilling, confirm that the area is clear of hidden wiring, plumbing, and other obstructions. Use the drill bit, pilot-hole depth, and fasteners specified for the wall construction and mounting system.
Secure the plate according to the manufacturer's instructions. Tighten the fasteners as directed and recheck that the plate is level and firmly attached.
Step 5: Attach the TV brackets
If the TV needs to be laid down, use a clean, padded surface and follow the television manufacturer's handling instructions. Avoid putting pressure on the screen.
Attach the mounting arms with the correct VESA screws and spacers. The screws should engage as intended without being forced. If the hardware does not fit correctly, stop and verify the required size.
Step 6: Prepare the cables
Connect any HDMI, audio, or other cables that would be difficult to reach after the TV is mounted. Leave enough slack for the bracket's intended movement, especially if you are using a tilting or full-motion mount.
Do not connect or conceal power wiring in a way that conflicts with electrical codes or the cable-management system's instructions.
Step 7: Lift and secure the TV
Have a second adult help lift and position the television. Engage the TV with the wall plate as instructed, then install every required locking screw, clip, or safety mechanism.
Do not release the screen until you have confirmed that it is properly attached and locked.
Step 8: Test the completed installation
Check that the TV is level and stable. If the mount is adjustable, test its intended movement range slowly and make sure cables do not pull tight or catch.
Confirm that the screen does not hit the wall, console, or nearby objects. Check the connected devices and verify that the console doors and drawers can open normally.
If the wall plate shifts, the TV moves unexpectedly, or a fastener appears loose, stop using the setup and have it inspected.
Choose a Media Console That Complements the Wall-Mounted TV
With the TV supported by the wall, the console can be selected for what it needs to do below the screen: hold equipment, organize accessories, and provide useful storage.
Look beyond the cabinet's overall width. Compare its height, depth, internal shelf dimensions, ventilation, cable openings, and recommended weight capacity. These details determine whether your devices fit and whether everyday connections remain accessible.
For a wide media wall: Vittorio 84-Inch Elm Media Console
The Vittorio 84-Inch Elm Media Console measures 84 inches wide, 18.8 inches deep, and 25 inches high. It is designed for TVs up to 85 inches and has four rear cord cutouts.
Its solid rubberwood and plywood construction with elm veneers, walnut elm finish, and raised grid detailing make it an option for a wide entertainment area. The generous width can also provide room for compatible accessories and décor, provided they do not block ventilation or access to equipment.
For a shallower footprint: Bodil 78-Inch Burl Media Console
If room depth is limited, the Bodil 78-Inch Burl Media Console measures 78.7 inches wide, 15.7 inches deep, and 23.6 inches high. It is designed for TVs up to 80 inches and includes one rear cord cutout.
Rubberwood and engineered wood with burl veneers give it a naturally varied brown finish. Adjustable shelves accommodate different components. Before choosing a receiver or game system, compare its dimensions with the usable interior space and check how the single rear opening works with your cable arrangement.
For a textured finish and adjustable storage: Renata 84-Inch Travertine-Textured Media Console
The Renata 84-Inch Travertine-Textured Media Console measures 84 inches wide, 18.9 inches deep, and 25 inches high. It is designed for TVs up to 85 inches and has four rear cord cutouts.
Made from resin and engineered wood with American oak veneers, this piece features a travertine-inspired finish, hammered brass-tone hardware, and adjustable shelves. Its textured surface and lighter appearance create a subtle contrast beneath a large wall-mounted screen.
For an arched black-oak look: Valborg 80-Inch Oak Media Console
The Valborg 80-Inch Oak Media Console measures 80.1 inches wide, 17.9 inches deep, and 25.9 inches high. Its product information lists TV size guidance up to 85 inches, two rear cord cutouts, and a recommended weight capacity of 230 pounds.
The console combines American solid oak and engineered wood with oak veneers in a black oak finish. Arched glass doors and three central drawers in the four-door configuration provide a mix of concealed storage and visual detail.
The 230-pound recommended capacity refers to the console's own supported load. It is not a rating for a wall-mounted television or a substitute for a properly installed wall bracket.
Compare the dimensions and practical details
Which console details matter most?
The right choice depends on the room and equipment:
-
Need a wide cabinet beneath a large screen? Compare the 84-inch Vittorio and Renata.
-
Working with limited room depth? Bodil has the shallowest listed depth among these four options.
-
Want more rear cable openings? Vittorio and Renata each have four.
-
Prefer a dark finish and a mix of enclosed storage and drawers? Valborg offers a black oak finish with arched glass doors and central drawers.
Before choosing, measure the equipment that will go inside the cabinet. Product-page TV size guidance describes the console's intended tabletop TV pairing; it does not determine the correct wall bracket or the wall's ability to support a mounted screen.
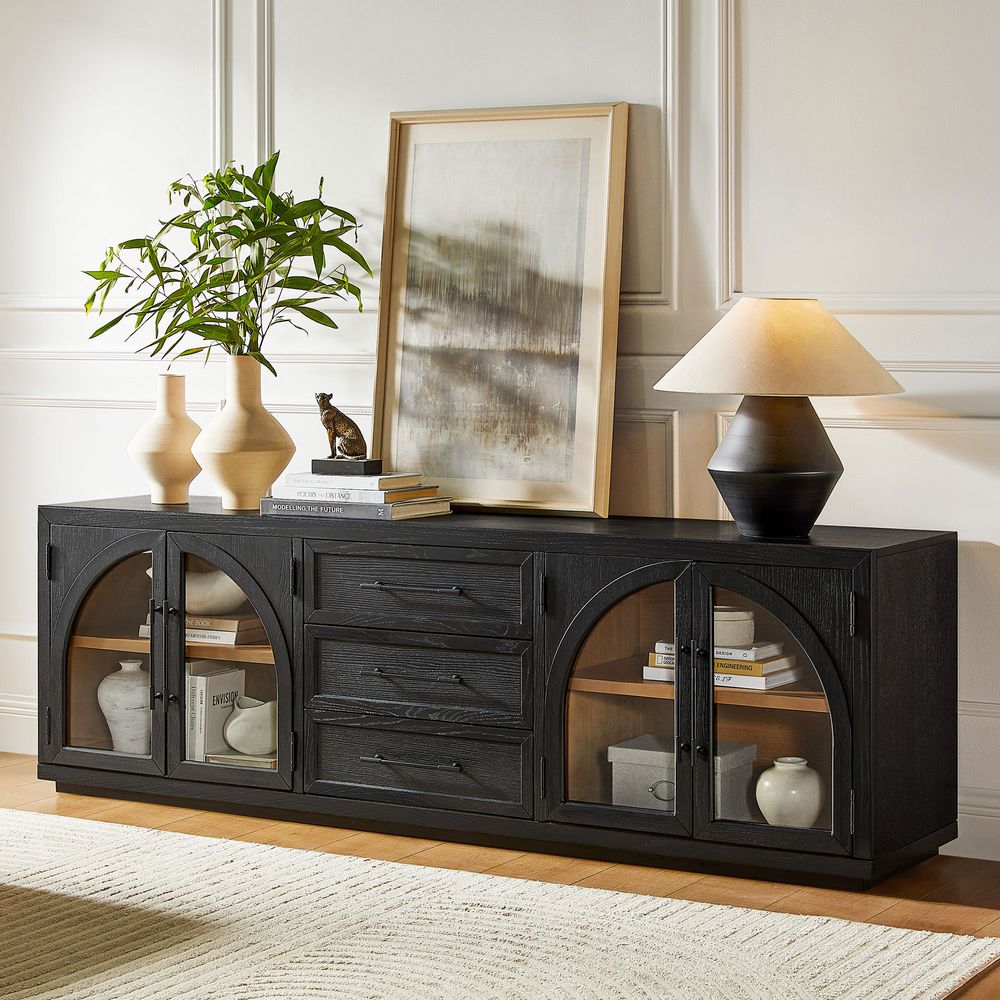
Valborg 80-Inch Oak Media Console
View Product
Plan Cable Management, Soundbar Placement, and Ventilation
A carefully positioned TV can still leave the entertainment area looking unfinished if cables hang down behind the console. Plan the route before lifting the screen.
Identify which devices connect directly to the TV and which will sit inside the cabinet. Measure cable lengths, allow for movement if you have an articulating mount, and keep connections accessible when they may need to be changed.
Choose a suitable cable-management method
HDMI, Ethernet, optical audio, and speaker cables are low-voltage connections. TV power cords and extension cords are different.
If you want wiring concealed inside the wall, use a listed in-wall cable-management system designed for the purpose and follow local electrical codes. Do not run an ordinary extension cord or power strip inside a wall.
If you need a new receptacle behind the screen, consult a qualified electrician and follow applicable local requirements.
A surface-mounted cord cover can be a simpler alternative when in-wall work is not practical. Choose one appropriate for the cables being routed, install it according to its instructions, and make sure it does not create a snag point or block access to a plug.
Leave enough room for a soundbar
If a soundbar sits on the console, measure its height and depth before setting the TV position. Leave enough clearance so it does not cover the bottom edge of the screen or block the TV's infrared receiver.
If the soundbar is wall-mounted, follow its own mounting instructions. Check that it does not interfere with the TV bracket or the screen's movement.
Allow electronics to ventilate
Receivers, game systems, streaming boxes, and other electronics may need open space around their vents. Do not pack equipment tightly into a cabinet or cover ventilation slots with décor.
Check each device's instructions for clearance requirements. Keep cables away from hot surfaces and route them where cabinet doors and drawers cannot pinch them.
Common TV Wall-Mounting Mistakes to Avoid
A few planning and installation errors can make the setup uncomfortable, unsafe, or difficult to maintain.
-
Choosing a mount by screen size alone: Check TV weight, VESA pattern, screw requirements, and bracket compatibility.
-
Assuming every wall is the same: Wood studs, metal studs, and masonry require different approved fixing methods.
-
Drilling without checking for hidden services: Look for electrical wiring, plumbing, and other obstructions before making holes.
-
Using the wrong screws: Incorrect diameter or length can damage the TV or create an insecure connection.
-
Mounting the screen too high: Start with seated eye level instead of copying a staged-room photo.
-
Ignoring console height: A tall cabinet can push the screen upward or leave too little room for a soundbar.
-
Forgetting the mount's movement range: An articulating arm needs clearance behind and beside the TV.
-
Blocking ventilation: Leave room for the TV and media equipment to release heat.
-
Concealing power cords improperly: Use a suitable in-wall power solution or a surface cord cover; never hide an ordinary extension cord inside the wall.
-
Leaving the console unsecured: A wall-mounted TV does not prevent a freestanding cabinet from tipping. Install the console's anti-tip restraint as directed.
-
Lifting a large TV alone: Have another adult help position the screen or hire a professional.
Complete a Final Safety and Placement Check
Before considering the installation finished, check more than whether the TV turns on.
For the wall-mounted screen:
-
Confirm that the wall plate is secure and all required fasteners are installed.
-
Make sure the TV is fully engaged with the bracket.
-
Check that every locking screw, clip, or retaining mechanism is in place.
-
Verify that the mount is not pulling away from the wall.
-
Check that cables have enough slack without becoming trapped.
-
Test the screen's intended movement range carefully.
For the console:
-
Make sure it sits level on the floor.
-
Adjust leveling feet if the manufacturer provides them.
-
Install the supplied anti-tip hardware according to the instructions.
-
Keep heavier equipment on lower shelves when practical.
-
Avoid placing tempting objects where children may climb to reach them.
-
Keep cords organized and out of reach.
If the wall is damaged, the studs cannot be located confidently, the bracket holes do not align with suitable support, or the installation involves unfamiliar masonry or metal framing, consult a qualified installer. Do not proceed if any part of the setup feels uncertain.
FAQs
How high should a TV be mounted above a TV stand?
Start by measuring seated eye level and aim to place the center of the screen near that height. Then account for the TV's actual dimensions, console height, soundbar clearance, and viewing distance. Avoid raising the screen simply to create a large decorative gap above the console. If the screen must sit higher, a compatible tilting mount may help adjust the viewing angle.
Do you need wall studs to mount a TV?
For a typical drywall wall with wood framing, a TV mount should be secured to suitable structural framing using the specified hardware. Metal-stud walls and masonry require their own approved mounting methods. The correct fixing system depends on the wall construction and bracket instructions. Do not assume ordinary drywall anchors can support a TV.
Can you mount a TV on drywall without studs?
Only when the wall-mount system is specifically approved for the wall construction and installation conditions. Many standard TV mounts require attachment to studs or masonry, while some specialized systems are designed for other applications. Generic hollow-wall anchors are not a universal substitute. Check the mount's instructions and consult a qualified installer if the requirements are unclear.
How do you know which TV wall mount fits your TV?
Check the TV's weight, VESA hole pattern, screen-size range, and manufacturer mounting instructions. Compare all of them with the wall mount's compatibility and weight ratings. Then choose fixed, tilting, or full-motion hardware based on your room layout, viewing position, and the clearance available around the console.
Should a TV stand be wider than a wall-mounted TV?
A console that is wider than the TV often creates a visually balanced arrangement and gives the screen a more grounded base. However, there is no universal width ratio. Consider the TV's actual outside width, the console's proportions, the room size, and nearby furniture. The console's width is a design and storage consideration, not a requirement for supporting the wall-mounted screen.
How much space should be between a TV and a TV stand?
There is no single gap that works for every setup. Leave enough room for a soundbar, speakers, cable access, and any movement of the wall mount while keeping the screen visually connected to the console. Measure the equipment that will sit on the console and check the bracket's extension and tilt range before drilling.
How do you hide TV wires after wall mounting?
Use a surface cord cover or a listed in-wall cable-management system designed for the cables involved. Follow the product instructions and local electrical codes. Do not run an ordinary extension cord or power strip inside a wall. If you need a new outlet behind the TV, consult a qualified electrician.
Is it better to wall-mount a TV or put it on a TV stand?
A wall mount can free up the console top and create a streamlined look, while a tabletop setup is easier to move and may avoid drilling. A wall-mounted TV paired with a console below combines the screen placement of a wall mount with the storage of a TV stand. The better choice depends on your wall, viewing position, room layout, and whether you want a more permanent installation.